
SKY3DS+, the latest version of the linker SKY3DS+, also the newest 3ds linker in the market, it is launched the last month in 2015 and early 2016 by sky3ds.com team. until today, this team has launched three versions, SKY3DSV1 with a red button, disappeared in a month after the launch because of its limitation of 10 games. SKY3DSV2 with a blue button that solved the problem of limiting the game. It exists until the release of version 3, SKY3DS +. We launched this version because Nintendo has added an Anti-Piracy check, SKY3DS V2 does not support this type of game 3ds. That’s why we launched the SKY3DS+ plus V3 to support 3ds games with AP check. compared with SKY3DS V2, SKY3DS+ also has the changes as below.
Change on the button:
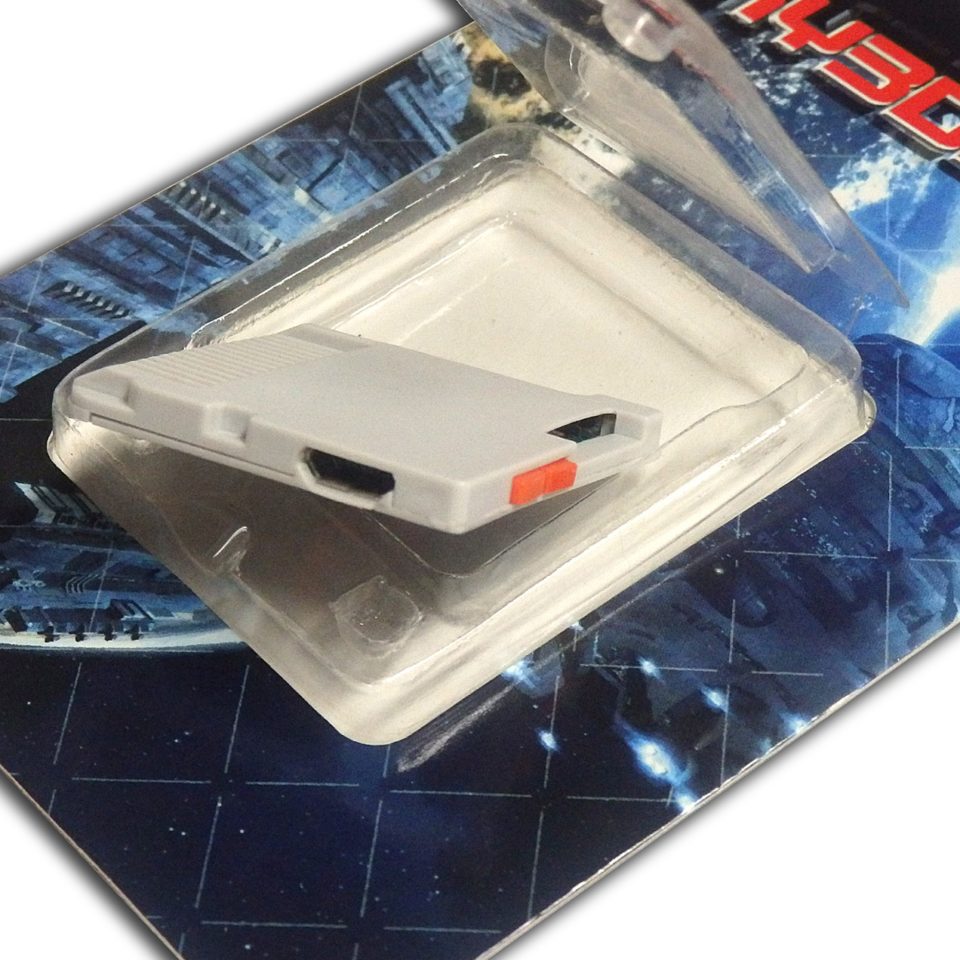
Linker SKY3DS V2 blue only has one button, when you change the game, you can only go to the next game, but not go to the last game. The SKY3DS+ has two orange buttons, one to return, the other to go to the next game. So it’s easier to change the game. Then. You can even change the game to a certain game by pressing the button several times (if you can remember the order of the game you want to play)
Change on the USB cable to save the ROMs in a micro SD card.
Linker SKY3DS blue asks a diskwriter tool to save the ROMs in a micro SD card, it is not so easy to use and makes the SKY3DS have a limitation of 31 games, but for sky3ds +, you no longer need diskwriter, this linker directly support shoot and play, just like using an R4 3DS to play DS games on 3ds if you know the R4 3DS.
Change on firmware to bypass the Nintendo patch in the future
SKY3DS v2 and New SKY3DS+ are all difficult for Nintendo a patch because it does not use 3ds exploit to modify the 3ds system. Both linkers emulate as a real map of the official 3ds game on 3DS, NEW 3DS and 2DS. So if Nintendo wants to do some things to avoid both linkers, you have to change the game. The 3ds games with AP check is an example. The SKY3DS+ can fix it but sky3ds can not. In addition, SKY3DS+ has a firmware, that means, it can be updated itself to deflect the Nintendo Patch to the future. So we do not need to buy a new linker.
STEPS TO FOLLOW TO USE THE SKY3DS PLUS
- Format your microSD card into FAT32 in Windows, and copy the ROMs directly to it, no tool like Diskwriter is needed.
- Download the most recent gamelist.bin (Much like the template file used for Sky3DS V2, which will be updated constantly for new games), copy it to the root of your microSD card.
- Launch your games, go from games to games by pressing back and forth with the new orange button.
INFORMATION FOR FUTURE 3DS GAMES
A settings.txt file and a .sav file will be created in your microSD card after the game is launched.
Open the settings.txt file, set CREATE_PER_GAME_SETTINGS = 1 (0 by default, it can change later) and save it, a .CFG file will be created on your microSD card. Once the game is over, it will include the specific info for this game (cart_id, FLASH_ID …). So you can build the .cfg file yourself to play a new game (or an online game), by correctly filling in this file if you have the information, which means that you do not have to wait for the update file gamelist.bin is available on the Sky3ds official website.
The .CFG file has a higher priority than the gamelist.bin file.
FIRMWARE SKY3DS+ UPDATE
The sky3DS + will come with the latest firmware4 (FIRMWARE_VERSION = 4 in the settings.txt, you will not need to update at this time). The team will put a new update on their website when necessary.
PROCEDURE TO UPDATE SKY3DS +
1. Download the update firmware.bin sky3DS.com, and copy to the root of your microSD card.
- Insert your microSD card into Sky3DS+, connect your PC and the sky3DS+ with a USB cable.
- The red LED stays on for 10 seconds, then turns green and continues to flash for
10 seconds. Once turned off, it means the sky3DS+ has been updated successfully.
Caution: Never disconnect the USB cable while the LED continues to flash green, it could damage your sky3DS+
- Delete the firmware.bin file present on your microSD card.